How to connect a NextJs application to Supabase with Prisma?
I am a full-stack developer with a passion for coding and a love of cooking, I'm always discovering the perfect recipe for success. With a keen eye for detail and a knack for problem-solving, I can create beautiful, fully functional web applications and when I'm not behind the computer, you can find me in the kitchen, working on my latest culinary creation I find the kitchen to be a great creative outlet that complements my work as a developer. In my free time, I also enjoy going for long walks, reading, swimming, or playing Tennis.
Definitions:
NextJs: A React framework that can be used to create full-stack web applications.
Supabase: Supabase is an open-source backend-as-a-service (BaaS) platform. It is built on top of Postgres and supports the SQL language. We will use supabase to store our data. That is the database.
Prisma: Prisma is an open-source database toolkit and object-relational mapping (ORM) tool for building scalable, type-safe, and performant database queries. We will use it to read and write data to the database.
To successfully do this, we will need to follow the following steps:
1. Create a NextJs application.
2. Start a supabase project.
3. Download Prisma and connect the application and database.
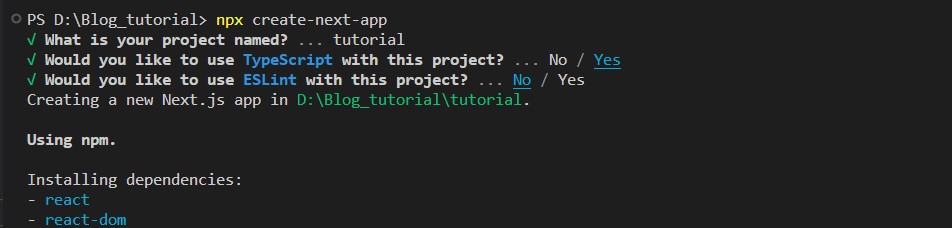
The first step is to create a NextJs app with npx create-next-app. For our tutorial, I am calling the project "tutorial" and using TypeScript.
Once the installation is done, we have to cd into the folder [cd tutorial] and run "npm run dev" and it should start the development server on https://localhost:3000
The second step is to create a supabase project. For that, we have to do the following steps:
Go to supabase.com
Click on Start Your Project and then sign in or signup if you don't have an account.
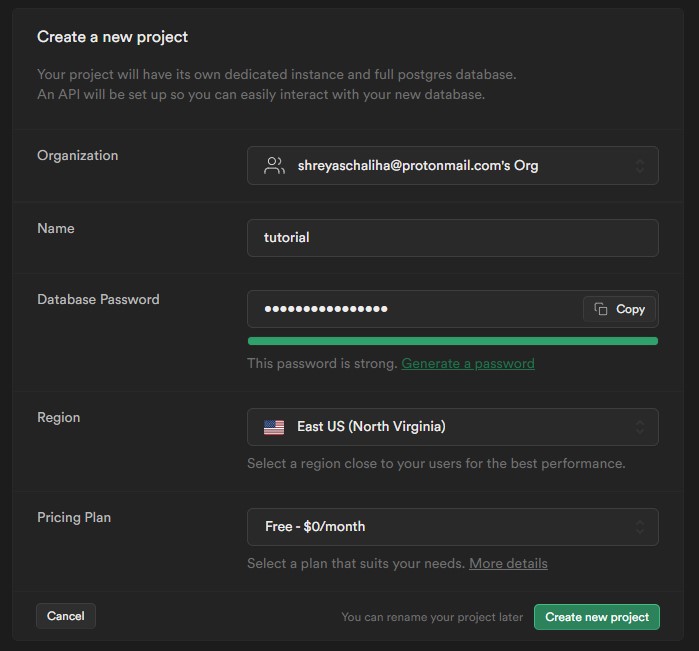
A dashboard will appear where you should have a button called "New Project", click on that button.

Provide a name for the project, and a password, and then click on "Create new project". In case you used the password generator, copy and paste the password somewhere safe since we will need to use it soon.
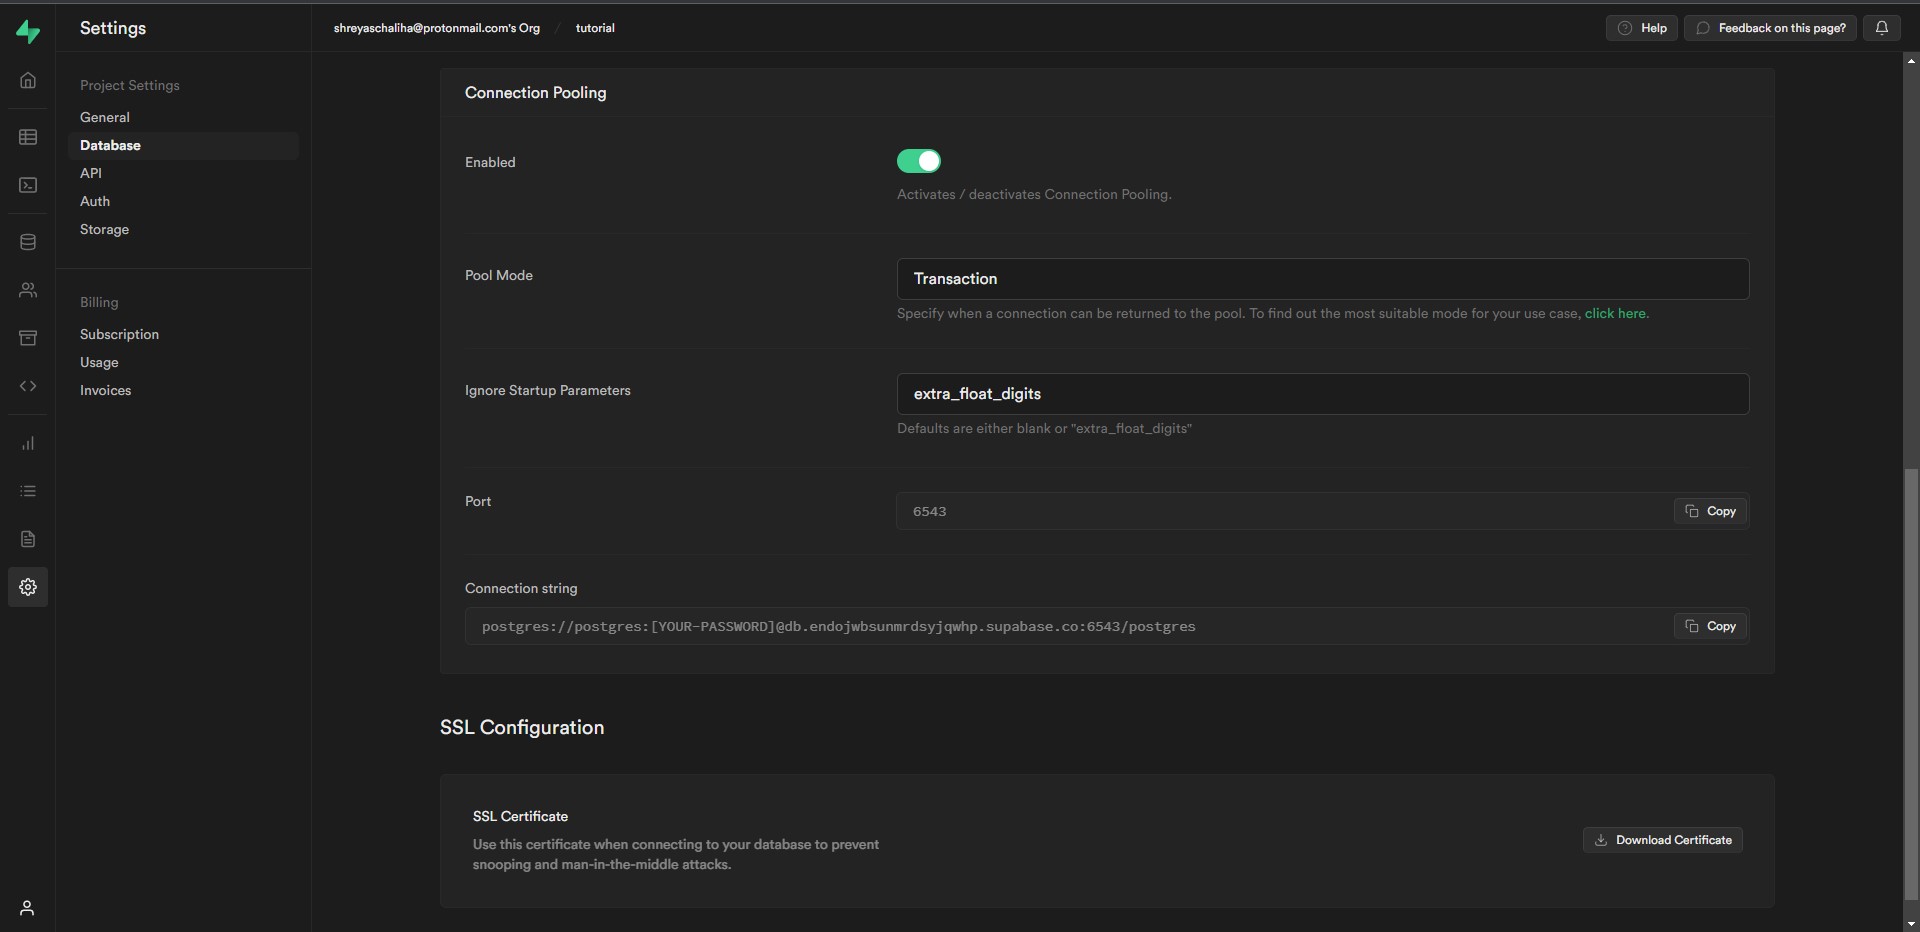
We can also get the database URL now which we will use to connect our application with the help of Prisma. To get the URL we need to go to "Settings [It is on the left side bar] -->Database --> Scroll down to Connection Pooling --> Connection String. [Look at the image below if you have any questions]
To connect our NextJs application to supabase we will use Prisma. For that, we will follow the following steps:
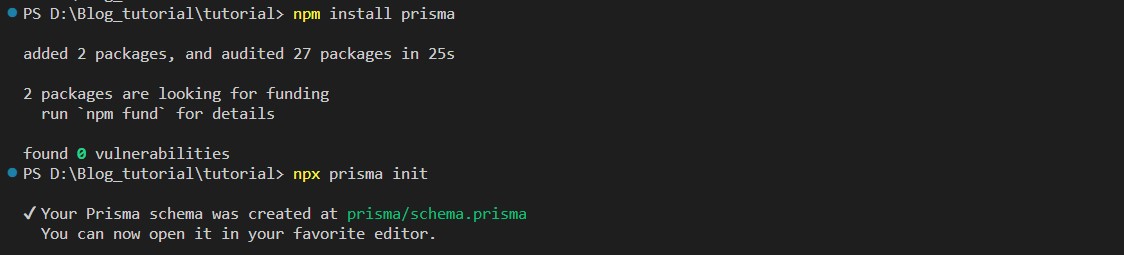
1. In our terminal, we will start another instance, run "npm install prisma", and then execute "npx prisma init" to create a prisma project inside our NextJs application.
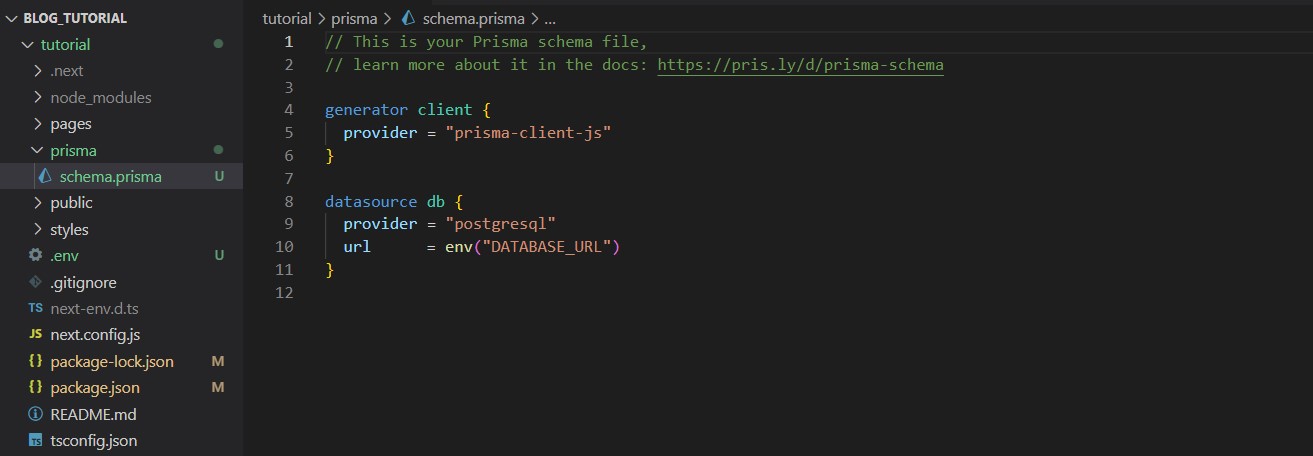
Once our project has been initialized inside our application, we will go to prisma --> schema.prisma
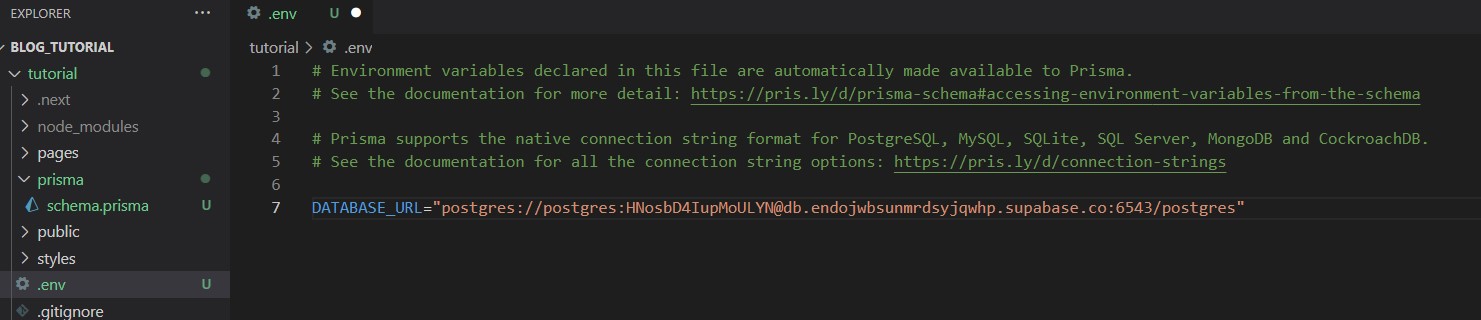
Now we need to go back to our supabase project site to get the DATABASE_URL.
Once we have the URL we need to go to the .env file and paste it there with our password.
That's all there is to it; your supabase database is now linked to your NextJs application via Prisma.
I hope this article helped you.
Happy hacking!


