Creating an application with Outerbase
This article will cover the process of creating a simple application with CRUD functionality with Next.js, clerk, and Outerbase using their SQLite DB.

I am a full-stack developer with a passion for coding and a love of cooking, I'm always discovering the perfect recipe for success. With a keen eye for detail and a knack for problem-solving, I can create beautiful, fully functional web applications and when I'm not behind the computer, you can find me in the kitchen, working on my latest culinary creation I find the kitchen to be a great creative outlet that complements my work as a developer. In my free time, I also enjoy going for long walks, reading, swimming, or playing Tennis.
NOTE: Outerbase is in beta, so things are subject to change. The article will cover the process I took to create a simple CRUD application on September 13, 2023. I will add the functionality to add UD very soon. As of September 17, 2023, I have added all the CRUD functionality.
Update: I have added Delete (D) functionality (September 17, 2023).
Update: Added Updated(U) functionality (September 17, 2023).
Outerbase is a modern, cloud-based database interface that enhances teamwork and efficiency. It features EZQL, a natural language to SQL agent for easy data queries, and allows real-time collaboration, workflow automation, and data visualization. It's suitable for developers for simplified database management, product teams for direct data access, and businesses for a comprehensive database view and cost reduction.
For this application, the complete back-end part is done through Outerbase including the database.
Purpose of the article
To help you get started to create an application with OuterBase.
Pre-requirement
Next.js application
Your choice of auth provider. I am using Clerk in the application.
What will I not cover in this article?
How to set the basic next.js installation. For that, check the next.js documentation
How to integrate Clerk with Next.js. For that, check their next.js quickstart.
Getting started with shadcn/ui. For that, check their documentation.
What will I cover in this article?
Creating a SQLite database in Outerbase.
Query to create a table with multiple rows to store information.
Commands to communicate with the front end.
Creating a SQLite database in Outerbase
Log in to your outerbase account and "Create a Database."
A form will appear. Fill it up and name it to your liking.
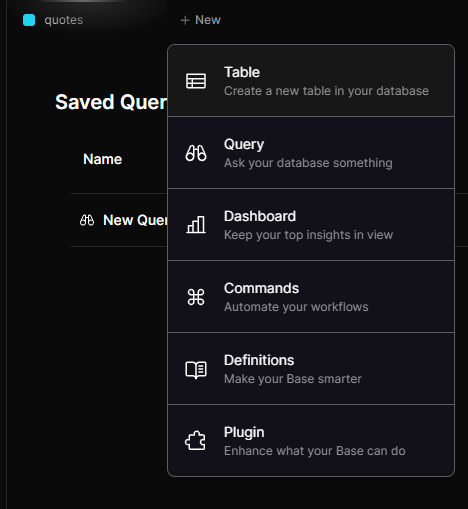
Then click on the + icon and click on Query. We will be creating a Table with a query.
- For my application, I used this query.
CREATE TABLE quote (
    id INTEGER PRIMARY KEY AUTOINCREMENT,
    user_id TEXT NOT NULL,
    quote TEXT NOT NULL,
    quote_by TEXT DEFAULT 'Anonymous',
    createdAt DATETIME DEFAULT CURRENT_TIMESTAMP
);
This is a SQL statement that creates a new table called "quote" with the following columns:
id - An integer column that will automatically increment and be used as the primary key for the table.
user_id - A text column that will store a user ID. This cannot be null.
quote - A text column that will store the actual quote text. This cannot be null.
quote_by - A text column that will store the name of the person the quote is attributed to. It has a default value of 'Anonymous'.
createdAt - A datetime column that will store the date/time the row was inserted. It has a default value of the current date/time.
After clicking on run I had to refresh my my page and then saw this. You should see something similar like this based on the name you provide and the how your define the columns.
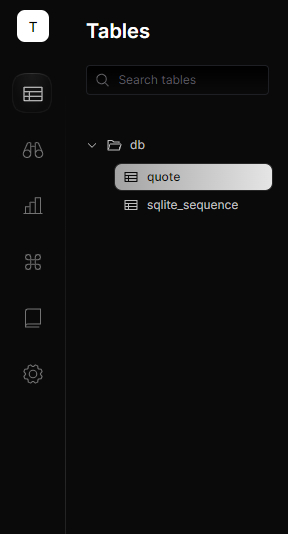
You can now click on the table name; for me, it is 'quote'. The following are the columns that were created and that were defined by me in the query code above.

Creating Commands
Commands are what we will use to communicate between the front-end and back end.
Creating a command to add a quote to the database
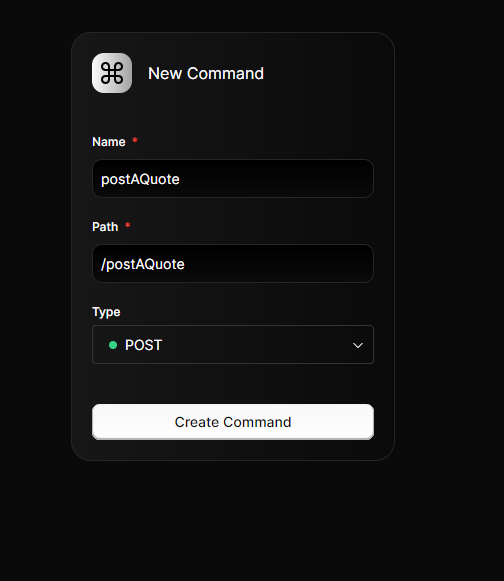
Click on the "+ New Icon" and click on "Commands"
A form will appear. Fill in the values with your desired name and Choose Post.
Click on "+" below the box and Click on "Database Query."
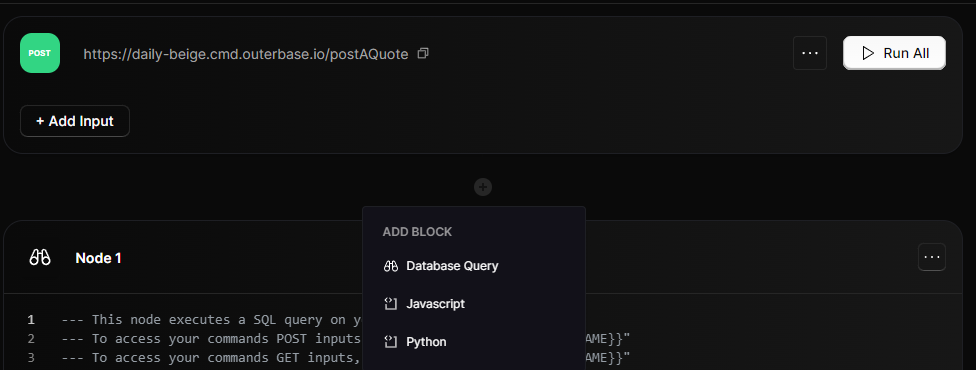
- I used the following query.
INSERT INTO quote (quote, quote_by, user_id)
VALUES ('{{request.body.quote}}', '{{request.body.quote_by}}',
'{{request.body.user_id}}');
Click on Save.
Communicating with Front-end with the created command
This part might be very subjective. For my application, I have used react-hook-form and Zod for front-end validation.
In this article, I will only go over the communication part not about creating the form. The whole code can be found here.
If you check that code you will see this part
  const onSubmit: SubmitHandler<FormData> = async (values) => {
    try {
      setLoading(true);
      await fetch(`https://daily-beige.cmd.outerbase.io/postAQuote`, {
        method: "POST",
        headers: {
          "content-type": "application/json",
        },
        body: JSON.stringify({
          quote: values.quote,
          quote_by: values.quote_by,
          user_id: values.user_id,
        }),
      });
      toast({
        description: "Success.",
        duration: 3000,
      });
      form.reset();
      router.refresh();
      router.push("/");
    } catch (error) {
      toast({
        title: "Failed to submit data",
        description: "Make sure all fields are filled up.",
        variant: "destructive",
      });
    }
  };
Breakdown of the code:
onSubmit - This is the function that will run when the form is submitted. It accepts the form values as a parameter.
SubmitHandler<FormData> - This types the onSubmit function to accept FormData as its argument.
async/await - The function is async to allow asynchronous fetching.
setLoading(true) - Sets a loading state before fetching.
fetch - Makes a POST request to the provided endpoint to submit the form data. This is the endpoint of the Command I created.
Headers - Sets the content type to JSON for the request body.
Body - Stringifies the form values into a JSON object to send.
toast shows a success toast notification after the fetch.
form.reset() - Resets the form fields after submission.
router.refresh()/push - Refreshes the current route and pushes it to another page.
Catch - Catches any errors and shows a failure toast instead.
So in summary, it handles submitting the form, displaying notifications, resetting the form, redirecting the page, and catching errors. The async/await syntax allows it to make the asynchronous network request to submit the data.
I followed a similar process to create a Command to get all the quotes and used it to fetch all the quotes from the database, which can be seen in this code.
Delete functionality
For deleting a quote, I am using a DELETE Command from Outerbase. For the front end, I have added the logic for displaying the '...' button if the id value for the currently logged-in user is the same as the quote's user_id using the ternary operator. Code.
Creating the delete Command
The initial steps are the same as described above for creating a Command. For the type I chose "Delete"
On the Database Query node, I have the following:
DELETE FROM quote WHERE id = '{{request.body.id}}';
Communicating from the front end
Once the user clicks on '...' button and dropdown should be displayed which contains 1 option called Delete.
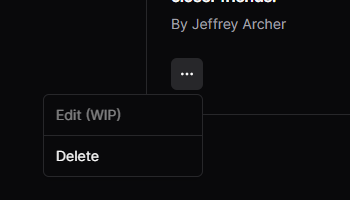
Once you click on the delete button, it makes a DELETE request to the /deleteQuoteById endpoint, passing the id of the quote as the request body.
After the successful execution of the command, a Toast is displayed which says "Successfully Quote Deleted."
Update functionality
For updating a quote, I am using a PUT Command from Outerbase. For the front end, I have added the logic for displaying the 'Edit Quote' button if the id value for the currently logged-in user is the same as the quote's user_id using the ternary operator. Code.
Creating the Update Command
Using EZQL
The initial steps are the same as described above for creating a Command. For the type I chose "PUT".
To create this command I used the help of EQZL.
On the Database Query node, I have the following:
UPDATE quote
SET quote = '{{request.body.quote}}', quote_by = '{{request.body.quote_by}}'
WHERE id = '{{request.body.id}}';
Communicating from the front end
Once the user clicks on the "Edit Quote" button a Dialog should appear which contains the current quote, quote_by, and quote_id information.
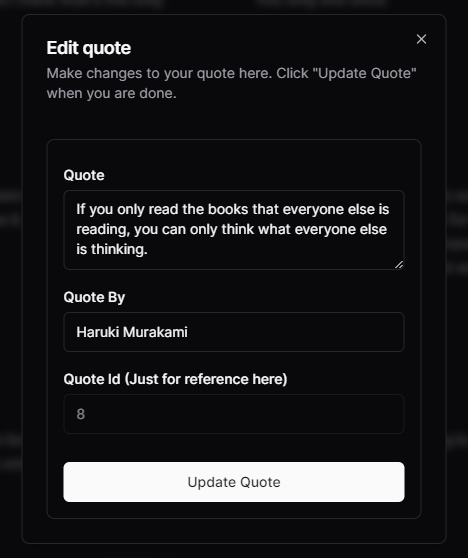
Once you click on the "Update Quote" button, it makes a PUT request to the /updateQuoteById endpoint, passing the new quote, quote_by, and id of the quote as the request body.
And that's how the update functionality works.
Demo Video: Youtube
Github Repo: https://github.com/trace2798/outerbase_quotes/tree/master
I hope this article helps you. If you have any questions, feel free to leave a comment, and I will respond to them as soon as possible.
Happy Hacking !!!


